 Pin It
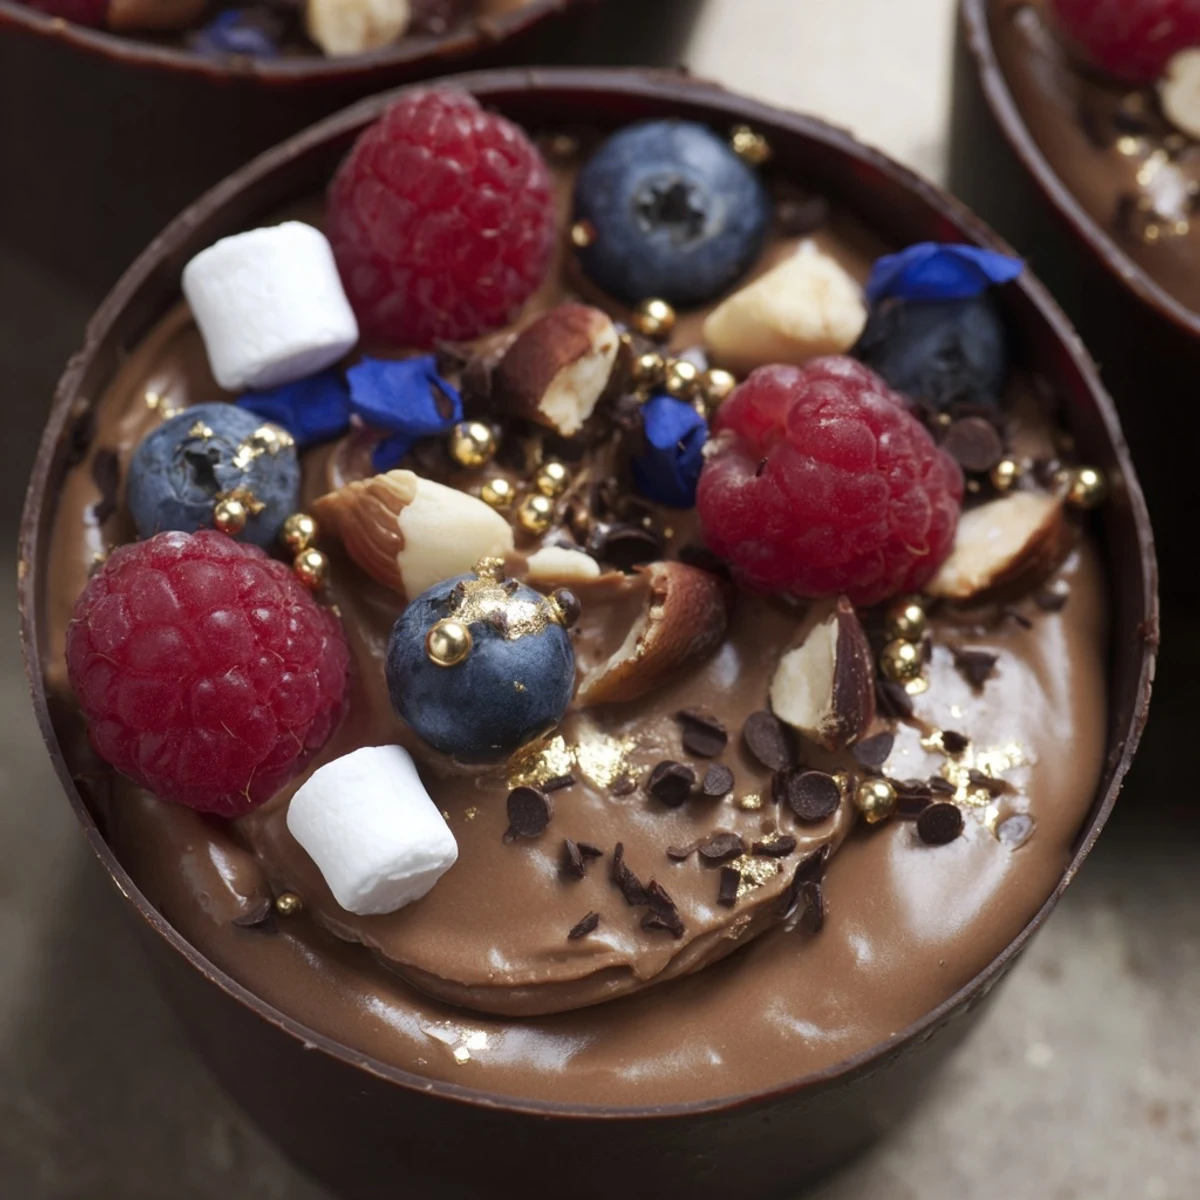
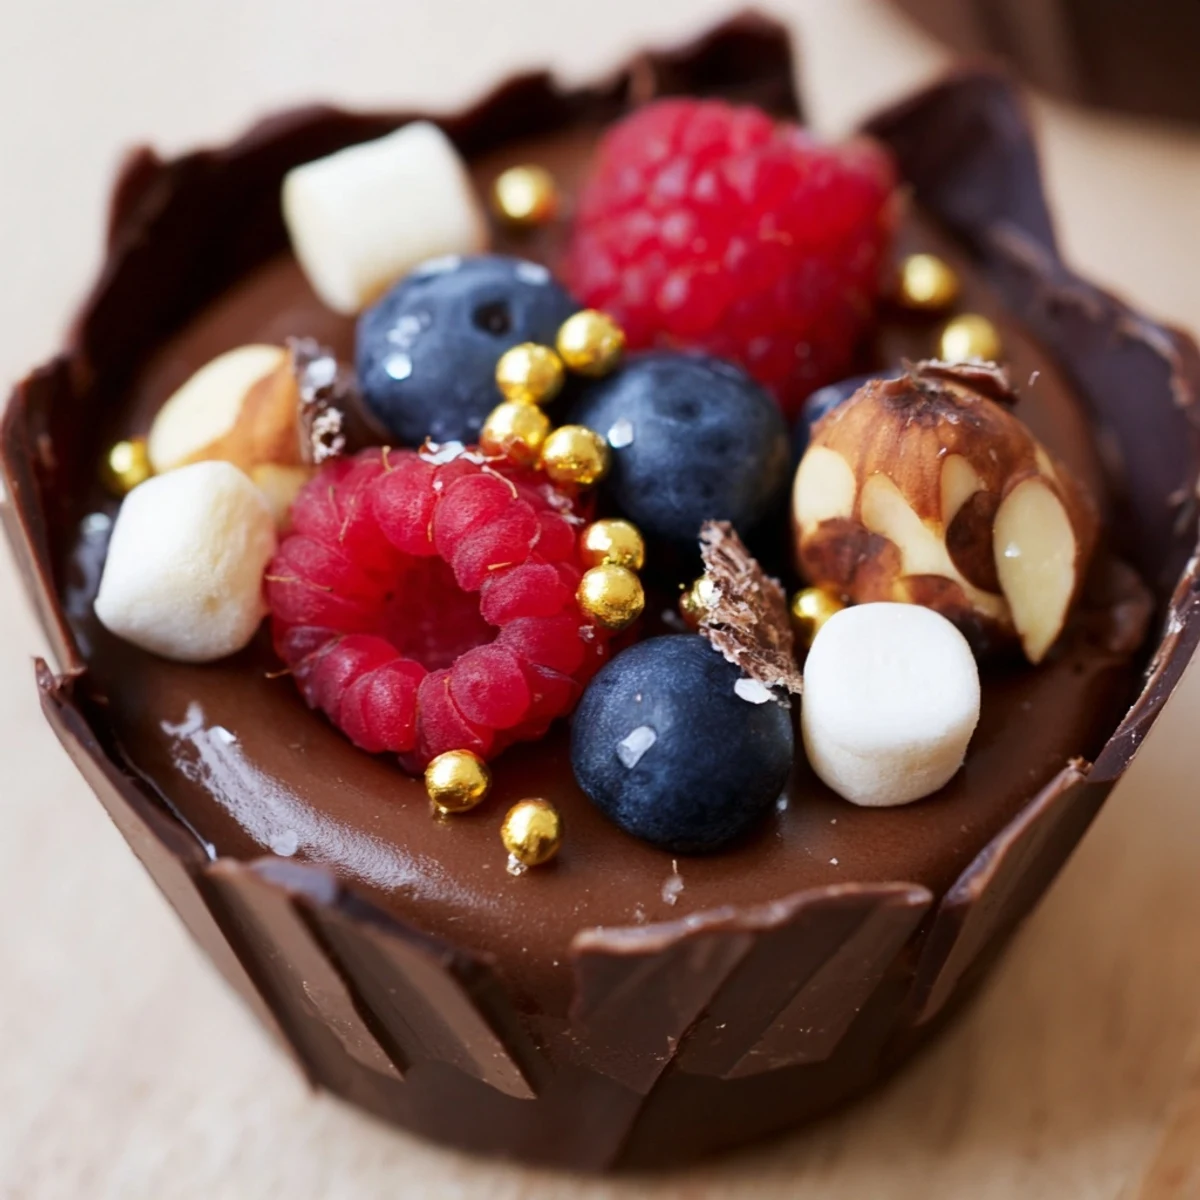
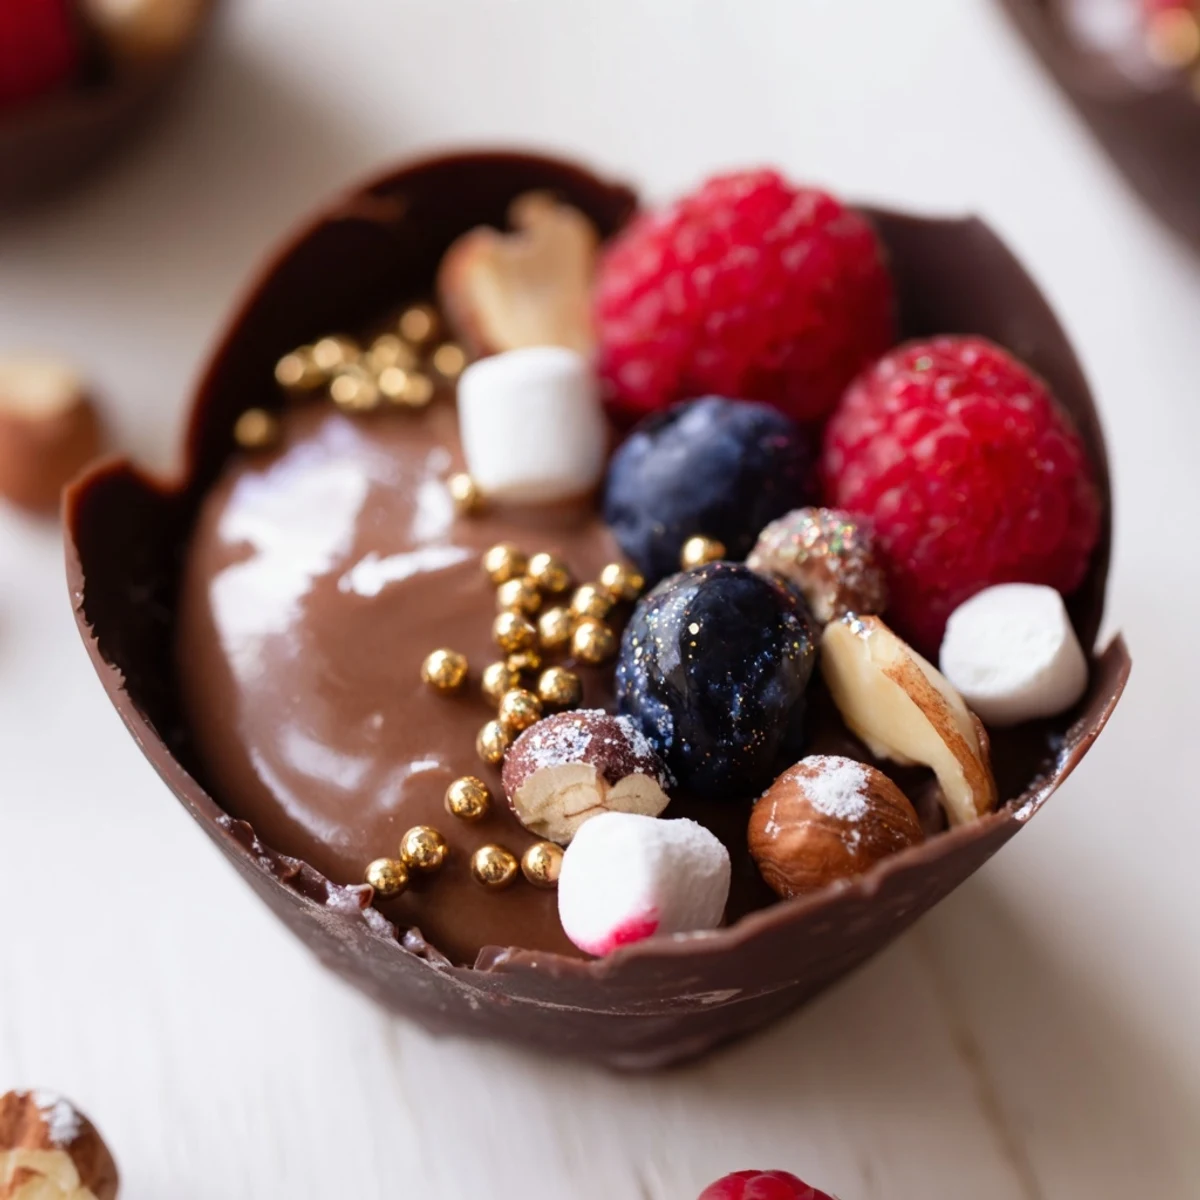
 Create stunning individual chocolate cups with velvety mousse filling and artisan toppings. These elegant desserts feature handmade dark chocolate cups filled with light, airy chocolate mousse, then crowned with fresh mixed berries, toasted nuts, marshmallows, and chocolate curls. Each luxurious cup delivers layers of contrasting textures—smooth, creamy, crunchy, and juicy. Perfect for dinner parties, wedding showers, or holiday celebrations where presentation matters.
The first time I made chocolate cups, my kitchen smelled like a chocolate shop exploded in the best possible way. I was attempting them for a friend's birthday, fully expecting cracked shells and lopsided edges. Instead, I pulled these delicate little vessels from the fridge and felt ridiculously accomplished, like I'd suddenly become a pastry chef overnight. Now they're my go-to when I want to serve something that looks fancy but secretly takes minimal effort.
Last summer I made these for a garden party and watched my friend's eyes light up when she bit through that snap of chocolate into the creamy mousse center. She made this little noise that confirmed every minute of chilling time was absolutely worth it. Something about eating dessert out of an edible container makes people feel special and indulged without me having to say a word.
Ingredients
- Dark chocolate: Using at least 60% cocoa gives these cups their sophisticated flavor and that satisfying snap when you bite through them
- Heavy cream: The backbone of your mousse, so dont skimp on quality here since it carries most of the texture
- Powdered sugar: Dissolves beautifully into the cream without leaving any grainy texture behind
- Vanilla extract: A small splash that makes chocolate taste more like itself, if that makes any sense
- Fresh berries: The tartness cuts through all that rich chocolate and prevents the dessert from feeling too heavy
- Chopped nuts: I prefer hazelnuts for their earthy flavor but whatever you have works perfectly fine
- Mini marshmallows: Purely for the fun factor and that pillowy texture contrast against the crunch
- Chocolate curls: These are easier to make than they look and add such a professional finishing touch
Instructions
- Craft your chocolate cups:
- Melt the dark chocolate until it's glossy and smooth, then use a pastry brush to coat your cupcake liners with an even layer. The brush method gives you much more control than trying to pour and swirl the chocolate around.
- Let them set properly:
- Chill the coated liners for at least 20 minutes because rushing this step is how you end up with broken cups and chocolate everywhere. Trust me, I learned this the frustrating way.
- Remove the liners carefully:
- Once firm, peel off the liners slowly starting from the top edge. If a cup cracks, just eat it and move on with your life.
- Whip the cream base:
- In a chilled bowl, whip your heavy cream with the powdered sugar and vanilla until you have soft peaks that barely hold their shape. Over-whipping makes the mousse too stiff, so stop when it looks like thick clouds.
- Prepare the chocolate:
- Melt your second batch of dark chocolate and let it cool slightly so it doesn't seize when it meets the cream.
- Combine everything:
- Fold a spoonful of whipped cream into the chocolate first to lighten it up, then gently fold that mixture back into the remaining cream. The key here is being gentle to keep all that air you just whipped in.
- Fill your cups:
- Spoon or pipe the mousse into each chocolate cup until they're about two-thirds full. They'll look elegant and leave room for all those beautiful toppings.
- Add the finishing touches:
- Pile on the berries, nuts, marshmallows, and chocolate curls however feels right to you. This is where you can make each cup unique and let your creativity show.
- Final chill:
- Let everything set in the fridge for at least 20 more minutes before serving. This waiting period is torture but absolutely necessary for the best texture.
 Pin It
 My sister still talks about the time I served these at Christmas dinner, describing how the chocolate shell cracked perfectly under her spoon. There's something so satisfying about watching people experience a dessert that looks impressive but tastes even better than it looks. Those moments of pure food joy are exactly why I keep making these year after year.
Making Ahead
You can prepare the chocolate cups up to two days in advance if you store them in an airtight container between layers of parchment paper. The mousse holds up well for 24 hours in the fridge, but I wouldn't push it beyond that or the texture starts to suffer. Toppings are best added right before serving so the nuts stay crunchy and the berries look fresh.
Chocolate Options
While dark chocolate creates this sophisticated flavor profile, milk chocolate cups work beautifully for a sweeter, more nostalgic version that kids tend to prefer. White chocolate is trickier to work with since it burns more easily and the cups are more fragile, but the result is stunning and creamy. I usually stick with dark for the shells and play around with chocolate varieties in the mousse filling instead.
Serving Suggestions
These cups shine on a dessert table because they're individually portioned and look absolutely stunning grouped together on a platter. I like to serve them with small spoons and maybe some extra berries scattered around the platter for color. Consider the drink pairing carefully because something too sweet will overwhelm your palate.
- A crisp dessert wine cuts through the richness beautifully
- Espresso or strong coffee balances all that chocolate intensity
- Sparkling water with lemon refreshes your palate between bites
 Pin It
 These chocolate cups are proof that sometimes the most impressive desserts are actually the simplest ones to make. Hope they bring as much joy to your table as they've brought to mine over the years.
Recipe FAQs
- → How far in advance can I make these?
-
Prepare chocolate cups and mousse up to 24 hours ahead. Assemble just before serving to maintain crisp textures and fresh berry appearance.
- → Can I use white chocolate instead?
-
Absolutely. White chocolate creates beautiful contrast and pairs wonderfully with berries. The preparation method remains identical regardless of chocolate type.
- → What if my chocolate cups crack when removing liners?
-
Ensure chocolate is thoroughly chilled before peeling. Work slowly and gently. Thin, even layers prevent cracking. If damaged, use as crumble topping instead.
- → How do I store leftovers?
-
Keep assembled cups refrigerated in an airtight container for up to 2 days. Note that textures soften over time and fresh berries may release moisture.
- → Can I make these vegan?
-
Use dairy-free dark chocolate and coconut cream instead of heavy cream. The mousse texture remains luxurious while accommodating plant-based diets perfectly.
- → What other toppings work well?
-
Consider crushed cookies, caramelized nuts, fresh mint leaves, edible flowers, citrus zest, or toasted coconut flakes for creative variations and seasonal flair.