 Pin It
 Master the art of laminated dough with this stunning bread that brings croissant technique to a loaf format. The process involves folding cold butter into enriched dough through multiple turns, creating those signature flaky layers that rise into golden perfection.
Plan ahead for this rewarding project—the total time includes crucial chilling periods that help develop those irresistible buttery pockets. Your kitchen will smell like a French bakery as it bakes.
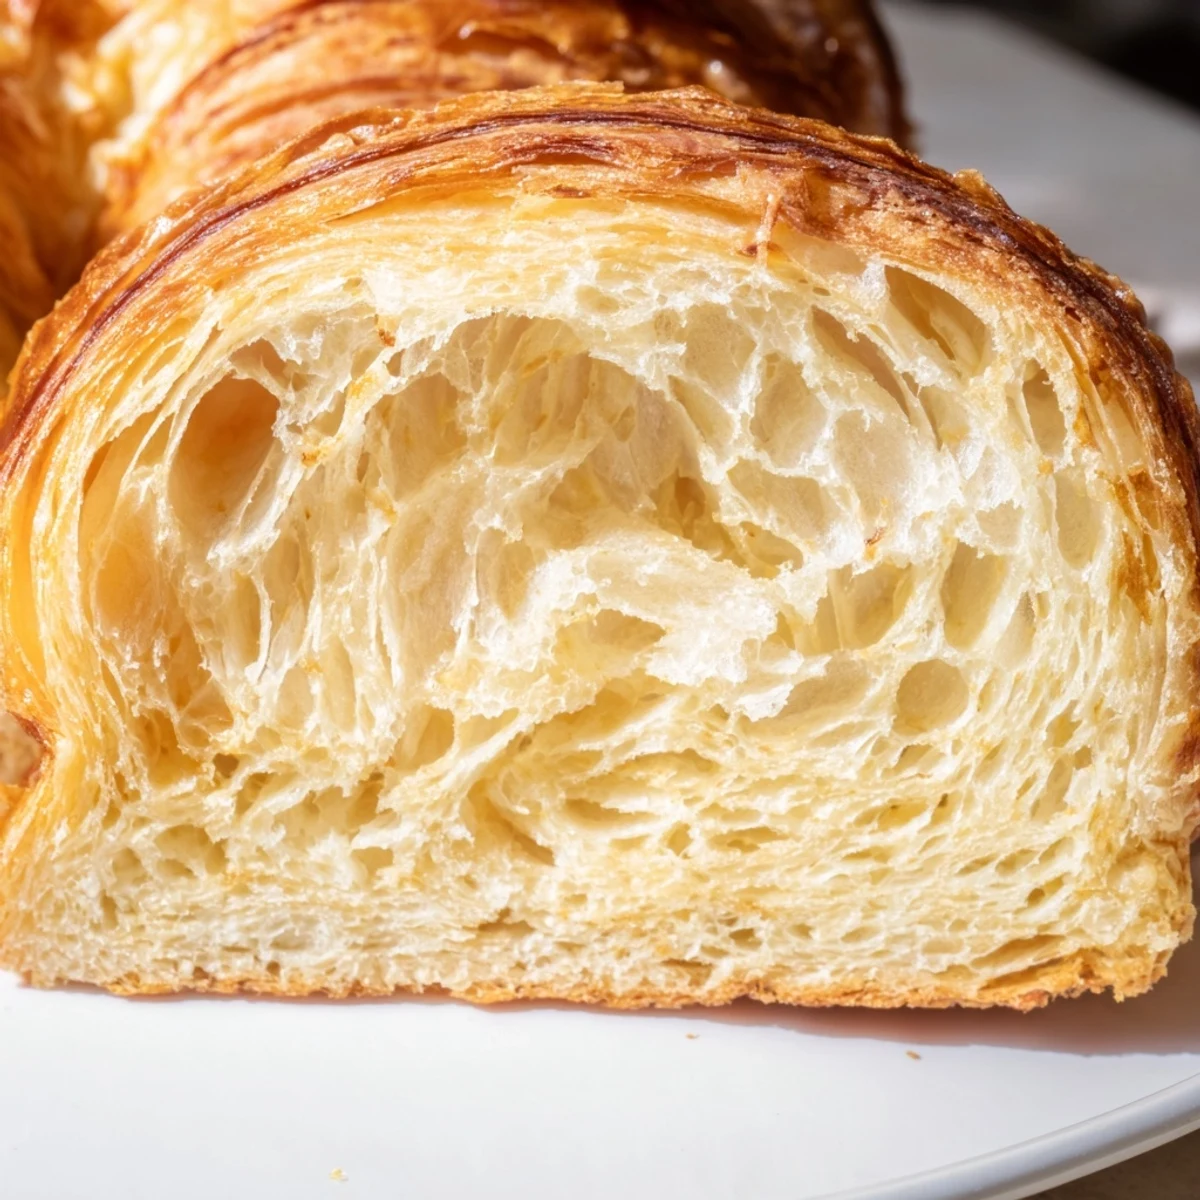
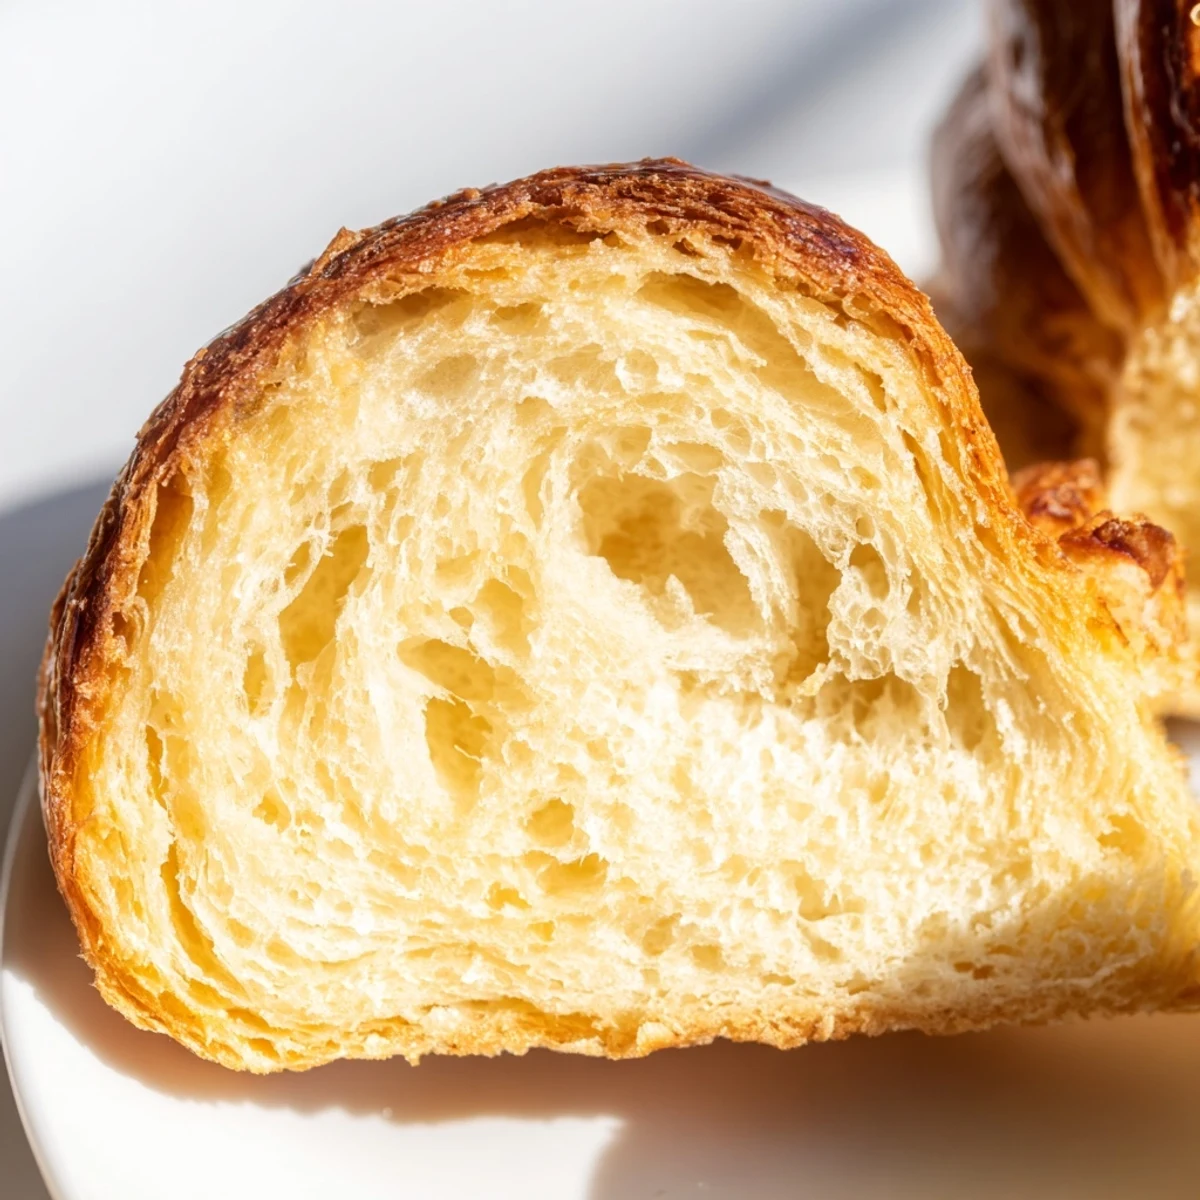
Slice thick pieces for toast, sandwich thin layers with jam, or enjoy warm from the oven. The laminated structure means every bite offers that satisfying shatter and tender crumb bakers love.
The first time I attempted laminated dough, my kitchen looked like a flour bomb had gone off. I was making traditional croissants, and somewhere between turn three and four, my butter block decided to merge completely with the dough. My husband walked in, surveyed the scene, and asked if I'd been baking or fighting a war. We ate those imperfect, buttery croissants anyway, and something about that process stuck with me.
Last winter, my sister stayed with us during a particularly gloomy week. I woke up early on a Saturday, determined to make something that felt like cozy comfort food. When she wandered into the kitchen, drawn by the smell of melting butter and yeasting dough, she actually stopped in her tracks. We spent the whole morning watching the snow fall through the window, slicing thick warm pieces and slathering them with raspberry jam.
Ingredients
- 3 ½ cups all-purpose flour: Bread flour would make this too tough, while cake flour lacks the structure for all those layers
- 3 tbsp granulated sugar: Just enough to help the yeast work without making this sweet bread
- 2 tsp instant yeast: You can use active dry, just give it an extra five minutes to dissolve in the warm milk first
- 1 ½ tsp salt: Don't skip this or reduce it, salt is what balances all that butter and makes the flavor sing
- 1 cup whole milk: I've tried skim milk and the texture suffers noticeably, spring for the good stuff
- ¼ cup unsalted butter, melted: This goes into the dough itself, creating tenderness before we even start the lamination process
- 1 large egg: Room temperature eggs incorporate better into dough, so take it out of the fridge about twenty minutes before starting
- 1 cup unsalted butter, cold: This butter block creates the flaky layers, so keep it ice cold and handle it quickly
- 1 large egg and 1 tbsp milk: Whisked together for that gorgeous golden brown finish that makes bakery bread look so inviting
Instructions
- Mix the foundation:
- In a large bowl, whisk together the flour, sugar, salt, and yeast, keeping the yeast on the opposite side from the salt so it doesn't get inhibited. Pour in the warm milk, melted butter, and egg, then stir with a wooden spoon until everything comes together into a shaggy, sticky dough that clings to the spoon.
- Build the structure:
- Knead the dough on a lightly floured surface for seven to ten minutes until it transforms from sticky and rough to smooth, elastic, and slightly tacky. Place it in a greased bowl, cover with plastic wrap or a warm towel, and let it rise in a draft free spot for about an hour until it's puffy and doubled in size.
- Prep for lamination:
- Gently deflate the dough by pressing down on it with your knuckles, then shape it into a rough rectangle. Wrap it in plastic and refrigerate for thirty minutes while you slice your cold butter into thin, even pieces. This chilling step is crucial because if the dough is too warm, the butter will melt into it instead of forming distinct layers.
- Start the layers:
- On a lightly floured surface, roll the chilled dough into a twelve by sixteen inch rectangle. Arrange the cold butter slices over two thirds of the dough, leaving a one inch border around the edges, then fold the unbuttered third over the center and fold the remaining third over that like you're folding a letter.
- First turn complete:
- Rotate the dough package ninety degrees so the folded edges face you, then roll it out again to twelve by sixteen inches. Perform another letter fold, wrap tightly in plastic, and refrigerate for thirty minutes to let the gluten relax and the butter firm up again.
- Second and third turns:
- Repeat the rolling, folding, and chilling process two more times for a total of three complete turns. After each turn, you'll notice the dough becoming more cooperative and the butter staying in distinct layers. Keep track of your turns by pressing a small dimple into the dough with your finger after each fold.
- Shape the loaf:
- After the final thirty minute chill, roll the dough to approximately eight by sixteen inches, then roll it up tightly from the short edge into a cylinder. Place it seam side down in a greased nine by five inch loaf pan, cover loosely with plastic wrap, and let it rise until it's noticeably puffy and doubled in size, about an hour.
- Bake to perfection:
- Preheat your oven to 375°F and whisk together the egg and milk for the egg wash. Brush the risen loaf gently with the wash, being careful not to deflate it, then bake for thirty five to forty minutes until it's deep golden brown and sounds hollow when tapped on the bottom. If the top is browning too quickly, tent it loosely with foil for the last ten minutes.
- Cool completely:
- Let the bread cool in the pan for ten minutes to set the structure, then turn it out onto a wire rack. Wait until it's completely cool before slicing into it, otherwise the steam will escape and you'll lose some of those tender layers you worked so hard to create.
 Pin It
 This bread has become my go to when I want to impress people without making myself crazy. My neighbor said it reminded her of the breakfast croissants she'd eaten in Paris, which might be the best compliment I've ever received. There's something magical about cutting into a homemade loaf and seeing those buttery layers peeking back at you.
Making It Your Own
Sometimes I'll sprinkle cinnamon sugar over the buttered dough before the final fold, creating a sweet swirl that makes the house smell incredible. You could also add grated cheese or fresh herbs for a savory version that would be perfect alongside soup. The basic technique stays the same, but small additions can completely transform the final loaf.
The Science Behind Those Layers
What creates those gorgeous flaky pockets is steam released from the butter as it bakes in individual sheets separated by dough. Each time you roll and fold, you're creating more and more alternating layers of butter and dough. When the bread hits the hot oven, the water in the butter turns to steam, puffing up the dough layers and creating that signature texture that makes croissants so irresistible.
Storage And Serving
This bread keeps remarkably well at room temperature for up to three days, wrapped in plastic or stored in a bread box. I actually think the texture improves slightly on day two, as the flavors meld together and the exterior softens just a bit. For longer storage, slice it and freeze individual pieces, then toast them straight from frozen.
- Toast leftover slices and use them as the base for an incredible breakfast sandwich with scrambled eggs
- Day old bread makes exceptional French toast, absorbing the custard beautifully without falling apart
- Leftovers can be repurposed into bread pudding for a dessert that feels like a special occasion
 Pin It
 There's something deeply satisfying about mastering a technique that seemed intimidating at first. I hope this bread finds its way into your kitchen and becomes part of your own weekend morning traditions.
Recipe FAQs
- → Why does croissant bread need so many chill periods?
-
Cold keeps the butter firm during rolling. If butter melts into the dough, you lose those distinct flaky layers. Each chill rests the gluten and maintains the butter's separate structure, creating that signature shatter when baked.
- → Can I skip some of the rolling and folding turns?
-
Each turn builds more layers. Fewer turns mean fewer layers and less flaky texture. For authentic croissant texture, all three turns are essential. The process takes time but delivers unmatched results.
- → How do I know when the loaf is fully baked?
-
Look for deep golden-brown color on top. The loaf should sound hollow when tapped on the bottom, and an instant thermometer inserted in the center should read at least 190°F (88°C). Let it cool completely for the best texture.
- → Can I make this dough ahead of time?
-
Yes. Complete the rolling and folding process, wrap tightly, and refrigerate overnight. Let the dough warm slightly before shaping and the final rise. This actually improves flavor development.
- → Why did my butter leak out during baking?
-
This typically means the dough wasn't cold enough before baking, or the butter softened too much during rolling. Always work quickly and keep everything chilled. A hot oven (375°F) helps set the structure before butter melts.
- → Can I add fillings like chocolate or cinnamon?
-
Absolutely. Sprinkle cinnamon sugar or chocolate chips over the rolled dough before the final shaping. The fillings will spiral through the loaf, creating beautiful swirls in each slice.