Pin It
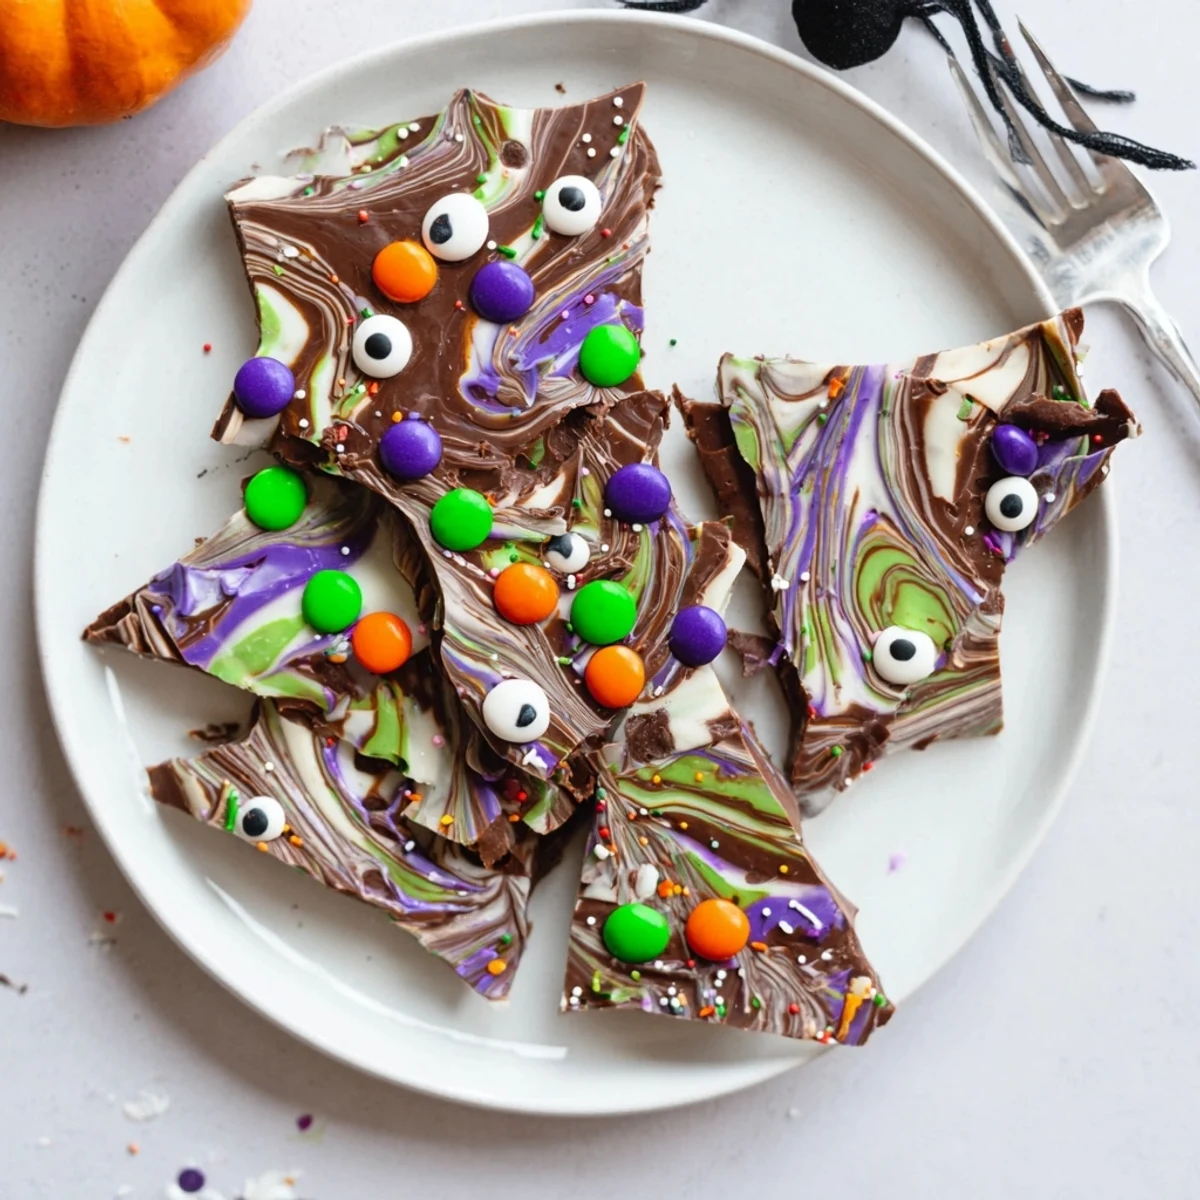
 This festive Halloween treat combines rich semisweet chocolate swirled with creamy white chocolate and vibrant candy melts for a marbled, magical appearance. The bark gets its spooky charm from candy eyes and colorful sprinkles, while mini chocolate candies add satisfying crunch throughout each bite. Simple microwave melting makes preparation effortless, and the finished bark breaks into perfect shareable pieces for parties or gift-giving. The recipe yields 12 servings and stays fresh for up to a week when stored properly.
The kitchen counter looked like a candy explosion had gone off, and honestly, I could not have been happier about it. My daughter had insisted we make something witchy for her class party, and somewhere between sprinkling edible glitter and debating whether candy eyes should go on the purple chocolate or the green, we realized half our supplies were already taste-testing casualties. This bark has become our October tradition because it's impossible to mess up and even harder to stop eating.
Last year I brought a platter to my office Halloween potluck, and I swear a grown man in accounting actually fought someone for the piece with three candy eyes on it. Watching adults get genuinely excited about breaking off chocolate shards with spooky faces staring back at them might be my favorite workplace memory ever. Now coworkers start asking me about it in September.
Ingredients
- 2 cups (340 g) semisweet chocolate chips: This creates your dark chocolate canvas, and I've learned that spending a little extra on quality chips makes the melting process noticeably smoother
- 1 cup (170 g) white chocolate chips: The contrast against the dark chocolate is essential for that dramatic witchy look
- 1/2 cup (80 g) colorful candy melts: Green and orange give you that perfect Halloween palette, though purple works beautifully too
- 1/2 cup (75 g) mini candy-coated chocolates: These add little pops of color and crunch throughout the bark
- 1/4 cup (40 g) candy eyes: The absolute star of the show, and I always buy extra because somehow they disappear during preparation
- 1/4 cup (30 g) Halloween sprinkles: Choose whatever speaks to your inner child, bones, bats, or pumpkins all work
Instructions
- Prep your canvas:
- Line a baking sheet with parchment paper, making sure it covers the entire surface, because chocolate seeping onto your pan is no fun to clean up later.
- Melt the dark chocolate:
- Heat the semisweet chips in a microwave-safe bowl, stirring at 30 second intervals until perfectly smooth and glossy.
- Spread the base:
- Pour the melted dark chocolate onto your prepared sheet and spread it into an even rectangle, about one quarter inch thick, working quickly before it starts to set.
- Prepare your colorful swirls:
- In separate bowls, melt both the white chocolate and colored candy melts, checking them every 20 seconds to prevent scorching.
- Create the marble magic:
- Drop spoonfuls of the melted white and colored chocolates randomly across your dark chocolate base, then use a toothpick to swirl them together gently.
- Add the spooky personality:
- Immediately scatter your candy-coated chocolates, candy eyes, and sprinkles across the warm bark, pressing them in slightly so they adhere as it cools.
- Let it set:
- Allow the bark to firm up at room temperature for about 30 minutes, or speed things up by refrigerating for 10 to 15 minutes.
- Break into pieces:
- Once completely set, use your hands to snap the bark into irregular, rustic pieces that look satisfyingly homemade.
 Pin It
 My neighbor texted me at midnight last Halloween demanding the recipe after trying it at our block party, and I may have created a monster because she now makes it for every conceivable occasion. Something about breaking chocolate into jagged pieces instead of cutting it neatly makes people feel wonderfully wild and rebellious.
Swirling Secrets
After making this dozens of times, I have discovered that less swirling often looks more dramatic than going overboard with your toothpick. Too much mixing muddies the colors into brownish gray, but just three or four gentle figure eights through your contrasting chocolates creates those stunning witchy patterns that make people gasp.
Make It Your Own
While the classic version uses traditional Halloween colors, you can absolutely adapt this for any holiday or theme. Pastel candy melts transform it into Easter bark, red and green Christmas swirls look gorgeous, and I once made a graduation version using school colors with mortarboard candy decorations. The technique stays the same, just swap the personality.
Storage And Gifting
This bark keeps beautifully in an airtight container at cool room temperature for up to a week, though in my house it rarely survives more than three days. Layer pieces between wax paper if you are stacking them, and package individual portions in clear cellophane bags tied with orange or black ribbon for the easiest homemade gifts imaginable.
- For shipping, pack the bark snugly in a tin with plenty of cushioning material
- If your room runs warm, store the container in the refrigerator to prevent melting
- The bark can also be frozen for up to two months if you want to get a head start on holiday prep
 Pin It
 May your Halloween be filled with more treats than tricks, and may your chocolate never seize. Happy haunting.
Recipe FAQs
- → How long does melting witches bark take to set?
-
The bark sets at room temperature in about 30-45 minutes, or you can refrigerate it for 10-15 minutes to speed up the process. Once firm, it's ready to break into pieces.
- → Can I use different types of chocolate?
-
Absolutely! You can substitute the semisweet chocolate with milk chocolate for a sweeter taste or dark chocolate for a more intense flavor. The melting instructions remain the same regardless of chocolate type.
- → How should I store the finished bark?
-
Store your bark in an airtight container at cool room temperature for up to one week. Avoid storing in the refrigerator as condensation can cause the chocolate to bloom and lose its glossy appearance.
- → What can I use if I don't have candy melts?
-
You can use additional white chocolate colored with gel food coloring, or simply skip the colorful swirls and focus on creating patterns with just the semisweet and white chocolate for a classic two-tone look.
- → Is this bark suitable for nut allergies?
-
The base bark can be nut-free if you choose candies and sprinkles that are explicitly labeled nut-free. Many brands of candy-coated chocolates and sprinkles are produced in nut-free facilities, but always check individual packaging.
- → Can I make this bark ahead of time for a party?
-
Yes! This bark actually tastes better when made 1-2 days ahead, allowing the flavors to meld. Prepare and store in an airtight container until your event. It's perfect for meal prep or party planning.